Inferno
CS2 Inferno Map Guide
Welcome to Inferno, one of the most tactical and iconic maps in CS2. To conquer this battleground, you’ll need a deep understanding of its layout, effective strategies for both T and CT sides, utility usage, and the art of rotation. So, let’s dive in and break it down.
Map Layout
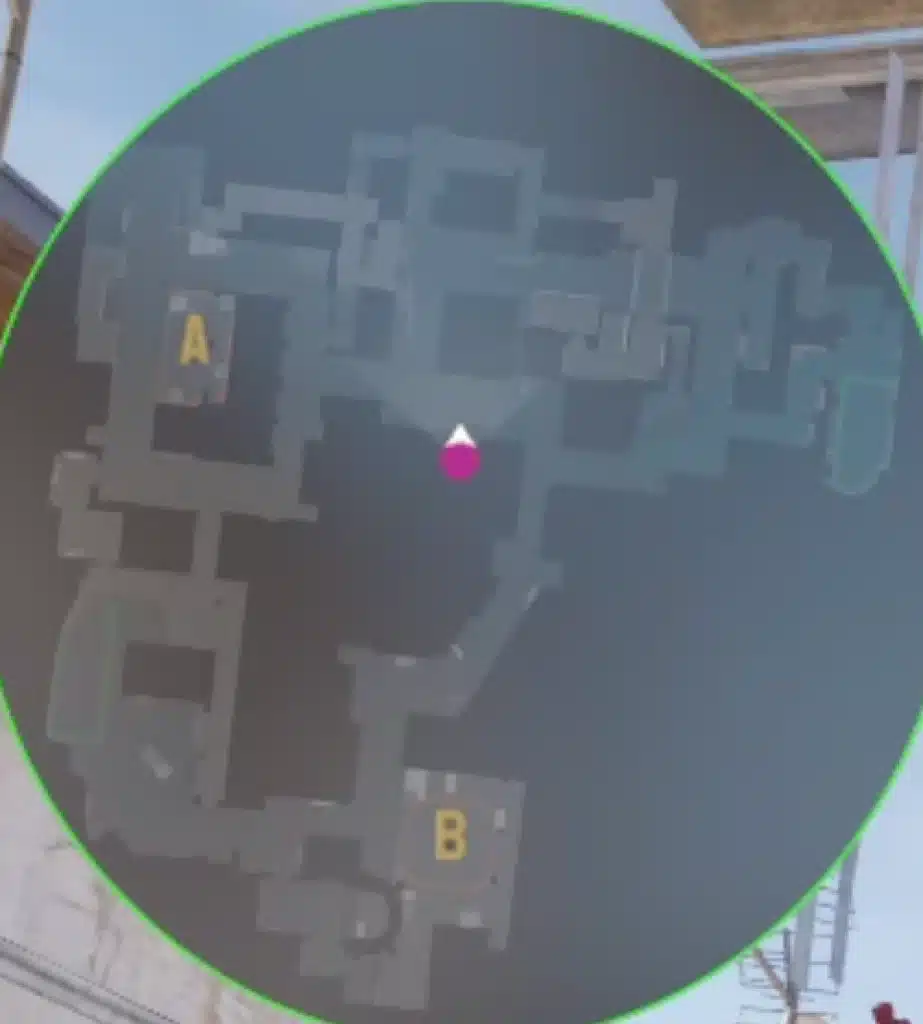
Inferno consists of two bombsites: A and B. The map features narrow lanes, choke points, and corners, making map control critical. A good strategy isn’t just about the aim but also understanding and using the map to your advantage.


CT-Side Strategies
Initial Positioning
Generally, you’ll start with three players on A and two on B. The A-side trio is usually divided among Apartments, Short (commonly known as Porch), and Long (or Arch side). The Long player must maintain control of Mid as long as possible. The AWPer usually takes this spot but should fall back to create a crossfire from the A-site and Pit if overwhelmed.
B-Side Control
Players on B aim to establish Banana control early in the round, often with a 3-player start for a utility dump. Once Banana control is established, one CT holds the Banana aggressively, and the others rotate back to A. If the T-side realizes this starting setup early, they’ll push A hard, so the Short and Apartments players must stay alive. After taking Banana, be alert to the possibility of a T-side retake, often done with a flashbang and multiple players.
Rotations
Quick rotations are key. Once Banana control is achieved, the extra B players need to rotate to A swiftly. Adapting and rotating quickly is essential, as savvy T-side players may try to exploit a weakness as soon as they identify the CT setup.
T-Side Strategies
The Default
The T-side often starts with a “default” setup, which involves two players taking Banana control, one (usually with an AWP) holding Mid, and two moving through Second Mid to Apartments. This setup can change based on the round’s specific strategy.
Taking Control
Early Banana control might involve braving the CTs’ utility, while a later take could wait for the CT utility to be exhausted before moving in. After gaining control of Banana, one player generally stays put while the rest rotate to help take Top Mid control.
Decision Time
Once you’ve controlled Top Mid and Banana, the options open up. Popular strategies include:
- An A wrap, sending three players down Long, one down Short, and one through Apartments.
- A Short push, concentrating forces on Short with an additional player in Apartments.
- A B split with three players pushing through CT to B and two coming from Banana.
- A fallback from Mid and throwing a full-execute on B.
Pistol Rounds
CT-Side
A default setup is often the best course of action on CT pistols. Especially if you play against 5-man stacks, you need to gamble a bit, so stacking Mid with four players and 1 B player with utility is a good variation. Also, you could stack B with 3 players early.
T-Side
Quick strategies like a B rush with an early smoke for CT or a full-force Mid-run can be highly effective for the T-side pistols.
Tips and Tricks
- Utility Game: On CT, well-placed smokes at the T-Ramp or Apartments can disrupt the T-side setup. Also, it would be best to smoke Mid too early when there is no pressure. On the T-side, you should flash Mid early and throw a Molotov at B car because it will deny information early. But keeping Molotovs for New Box or Dark on B can oust defending CTs.
- Eco Rounds: On Eco, unorthodox plays can pay off. Using shotguns and SMGs in tight spaces like Apps can yield surprising results.
- Communication: Callouts and team communication are essential for quick rotations and effective utility use. Especially on the T-side, stick with your team and your team’s plan (IGL) instead of pushing solo early.
Conclusion
Inferno is a map that rewards tactical depth, teamwork, and a strong understanding of rotations. Whether holding down A or taking Banana control, every action you make feeds into your team’s larger strategy. Master these principles; you’ll win more rounds and games on this quintessential CS2 map.